Creating a New Project
A new project is created by selecting File/New from the menu bar or by pressing Ctrl+N. The action will result in the appearance of the New Project DIalog Window dialog shown below.
Enter the name of the project and the location where you want the project to be saved and press OK (spaces should not be used in the Location and the Name). If an xml file already exists, let the name of the project be the same as the xml file.
When the project has been created the model view will be shown, see below.
The model view is used to draw waypoints, legs, land contours, bathymetry etc.
It is possible to zoom in and out using the mouse scroll view or using Page Up/Down keys. Alternatively the panning and zooming may be performed using the cursers and the bar located at the left part of the screen.
To measure distance, use the measurement ![]() icon.
icon.
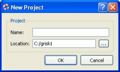
New Project Dialog
IWRAP Model View

